
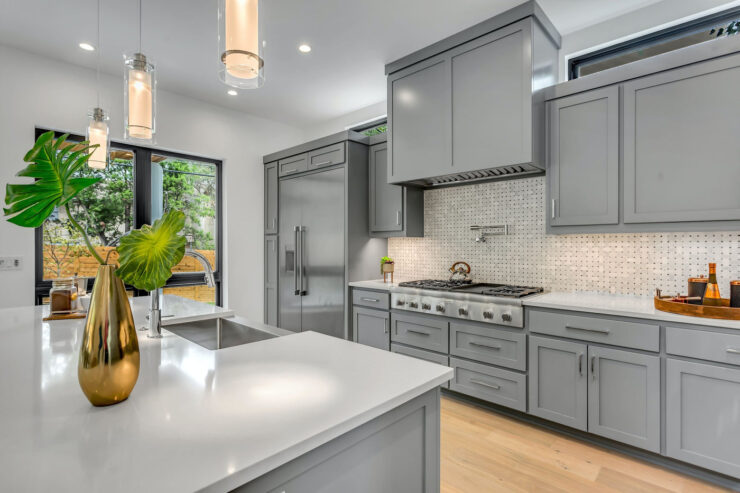
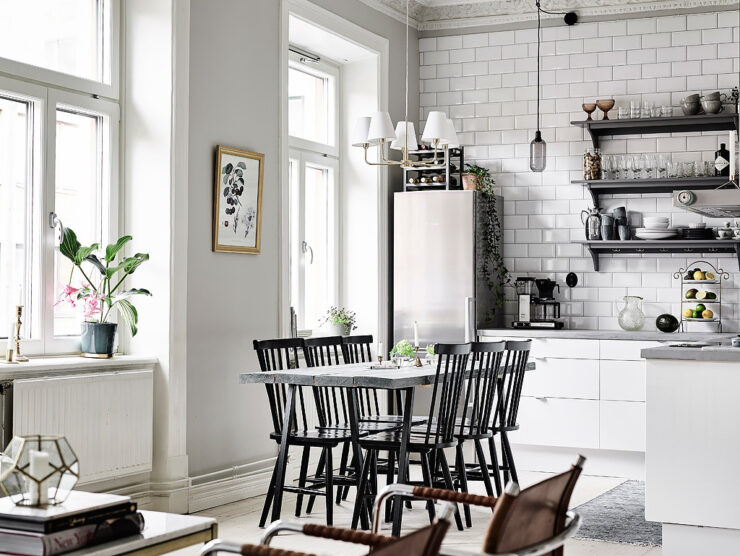
When thinking about kitchen design, cabinets are central in defining the space’s style and function. They’re more than just storage spaces; they’re the backbone of your kitchen’s visual appeal. A well-executed cabinet revamp, through refacing and painting, can dramatically alter your kitchen’s look without necessitating a costly complete remodel. This is the perfect solution for budget-conscious homeowners who are after a significant transformation without the hefty price tag. This comprehensive guide, packed with industry insights, will walk you through the process, revealing insider tips and tricks to achieve a professional finish. So, get ready, roll up your sleeves, and let’s revitalize your kitchen!
Assessing Cabinet Condition

Before embarking on the exciting journey of cabinet revamp, it’s crucial to take a considered approach by evaluating the current state of your cabinets. If the fundamental structure is sound—meaning there’s no water damage, severe warping, and the doors and drawers are functional—then refacing and painting present excellent, cost-effective options. It’s imperative to look for signs of structural issues like loose joints or rotting wood. These problematic areas might need repair or, in some cases, total replacement before proceeding with the beautification process. If you’re uncertain, consider seeking the opinion of a professional to ensure you invest your time and resources wisely.
Choosing Refacing Materials
Refacing is an effective method that involves sticking a thin layer of material over the current surface of your cabinets, giving them a brand-new, fresh facade. This process opens up a realm of design possibilities, with multiple options at your disposal: wood veneers, laminates, and rigid thermofoils (RTF).
Wood veneers, made from genuine hardwood, offer a warm, classic look but may stretch the budget. Laminates are synthetic, proving durable and available in a limitless range of colors and patterns. They, however, may not mimic the natural wood grain as convincingly as real wood. RTF is essentially a plastic coating heat-fused to medium-density fiberboard (MDF). It’s both affordable and resilient but may limit you in terms of design options.
Take the time to weigh the pros and cons of each material, considering factors such as your kitchen’s existing style, your budget, and the long-term durability you expect from your cabinets.
Picking the Right Paint
Choosing the correct paint type is critical as it will significantly impact your cabinets’ final appearance and durability. Latex paints are water-based, offering an easy cleanup, low odor, and a vast range of colors for unlimited creativity. Oil-based paints, although requiring more effort and care, provide a smooth, hard finish that stands up exceptionally well to the inevitable kitchen grease and grime. Chalk paint offers a unique, vintage look with a characteristic matte finish.
Consider the paint finish too. Glossy surfaces are easy to clean but may highlight any surface imperfections, while matte finishes hide flaws but can show stains more readily. A satin or semi-gloss finish can strike a happy, practical medium between aesthetics and function.
Gathering Tools and Supplies
Refacing and painting cabinets require an array of tools and materials, including but not limited to a quality paintbrush, roller, primer, your chosen paint, sandpaper, the selected wood veneer or laminate, strong adhesive, a sharp utility knife, and a few more items. You should find everything you need at your local home improvement store or online. Remember, using quality tools and materials not only makes the job easier but greatly influences the final result, giving your project a professional finish. If you’re having issues with either tools or supplies you might be wiser to contact experts, leave refacing and repeating aside and buy Hamilton kitchen cabinets which can be found if you visit this site.
Preparing Cabinets for Refacing
The first step to a successful refacing project involves removing cabinet doors and hardware to ensure an unhindered workspace. Next, clean all surfaces thoroughly to remove any grease or dirt, which could interfere with the adhesive and paint application. Sanding the surface is also critical for better adhesive and paint adherence—just be careful not to overdo it and damage the surfaces. This preparatory stage sets the foundation for the entire project and contributes significantly to the final outcome.
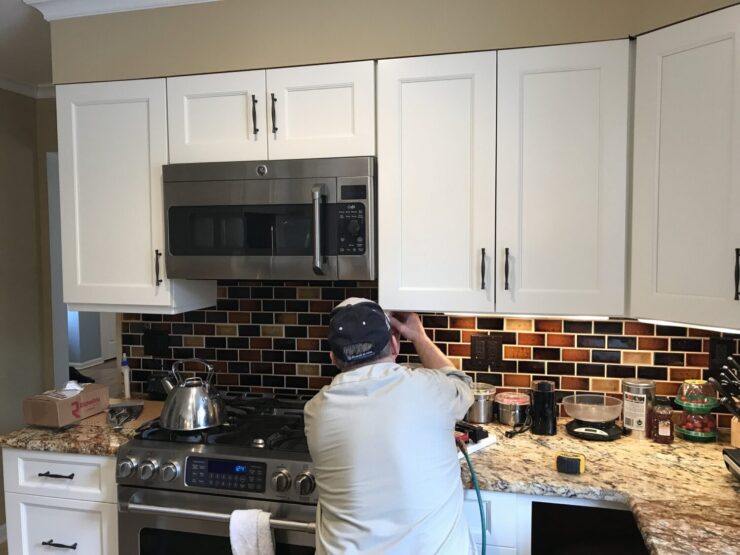
Refacing Cabinet Doors and Drawers
When it comes to the application of your chosen material, it involves cutting it precisely to size, applying a generous amount of adhesive, and carefully smoothing it onto the surface. It’s critical to be meticulous during this process to avoid unsightly air bubbles or misalignments. Trim any excess material with a utility knife and give it sufficient time to set before you begin reassembling. This stage requires patience, precision, and attention to detail for a high-quality finish.
Upgrading Cabinet Hardware

Installing new hardware can make an enormous difference in the look and feel of your cabinets, perfectly complementing your freshly refaced surfaces. When choosing knobs and handles, consider those that fit seamlessly with your kitchen’s overall style and the design of the cabinets themselves. Consider adding a modern twist with soft-close hinges for a luxurious, high-end touch. This seemingly small detail can add a significant impact, lifting the overall look and feel of your kitchen.
Painting Cabinet Frames
After priming, apply your chosen paint to the cabinet frames. The trick is to aim for thin, even coats, ensuring you allow adequate drying time between applications to avoid unsightly drip marks or brush strokes. This patience and attention to detail will result in a smooth, professional finish that looks as though it was done by a professional. Remember, the goal is to have your kitchen cabinets looking like new, so take the time to get it right.
Adding Finishing Touches
Once you’ve got the basics in place, consider adding optional enhancements like decorative trims or glass inserts for a more custom, high-end look. You can also stencil designs , add a distressed finish, or experiment with mixed materials to further personalize your cabinets. This stage allows you to infuse your unique style and personality into the space, transforming your kitchen into a place that truly feels like home.
Cabinet Maintenance and Care
Once your cabinets are looking fabulous, you’ll want to ensure they stay that way for as long as possible! Regular cleaning with a mild detergent, promptly touching up any chips or scratches, and avoiding hanging damp towels on cabinet doors can prevent water damage and maintain the cabinets’ fresh look. Proper maintenance is just as important as the refacing and painting process itself and will ensure your hard work pays off for years to come.